Tuesday, July 13, 2021

learning to solder at 74 yo

Well, you have to have a good reason, the right frame of mind, to learn something new.

Slowly it dawned on me that maker ed was the way to go for both school and community reform for the 21st C.

Soldering, although not absolutely essential, was a highly desirable skill, that would extend my ability to make new things. I'm still at the stage of making things driven by microcontrollers and soldering is required quite often for that.

So, right frame of mind, tick.

Next, you need good tools. I wasn't too sure what tools exactly but over a period of time of exploring the adafruit site, that became clearer. I have now ordered these tools for myself. In the interim because we setup a new Artbotics course at school and ordered tools for that I have access to those tools right now (all prices in USD)
  • Hakko FX 888D soldering station $129.95
  • Hakko 20-30 AWG wire strippers $14.95
  • Flush diagonal cutters CHP170 $7.25
  • Helping third hand magnifier $6.00
  • solder sucker $5.00
  • Multi coloured heat shrink various sizes $4.95
  • solder wick $3.00
  • Simple pliers $3.00
  • TOTAL USD$174.10
  • ROUGHLY AUD$226 (multiply USD * 1.3 exchange rate)

Good tools, tick

There is still a lot of hands on learning to do. Fortunately, there are excellent resources including YouTube videos out there.

I read the Hakko Soldering Station Instruction Manual and took notes. I read some online tutorials and watched some YouTube videos.

I did the same for wire stripping techniques. Check the leads you have bought for wire thickness in AWG (American Wire Gauge)

I practised with joining 2 bits of copper wire together, using the helping hand.

My first real soldering job was wiring up a GEMMA M0 to a neopixel LED dots strand for the neopixel fairy crown project. This one is relatively easy since the holes on the GEMMA are so big.

My next job was to achieve through hole soldering for the neopixel jewell 10 minute necklace. The holes on the jewell are much smaller and the solder is meant to fill the holes. If you are a beginner, like me, don't be fooled by the racy video which shows the whole thing being made in 10 minutes. It took me 2 days!

By the time I started the neopixel jewell soldering I had become a little complacent and overconfident and so made a complete botch of it. There were 3 leads of hook up wire to solder. One of them I fluked but for the others the solder didn't go into the holes and there were big blobs on the surface. I wish I had taken a pic to show you but probably it was too much of a shame job!

I hadn't learnt the technique. It's a matter of paying ATTENTION, close attention to what is being displayed in the YouTube videos.

Initially, I thought it was a disaster. But luckily I had a thin blade in my flat and realised I could clean up the mess with a bit of scraping.

In attempting to learn the technique, I drew some pictures in my notes. From what I had read and watched I thought I was meant to simultaneously heat up the metal pad around the hole, the lead or wire going into the hole and the solder itself. ie. don't just heat the solder, heat all the parts that need to join together.

I tried this a few times but it didn't work! The solder didn't melt even when I turned up the temperature of the iron to 400 degrees C.

Eventually, I realised, that the tip of the iron didn't generate enough heat to warm everything up. The instructions hadn't said this but when I went back and rewatched the videos I could see it was more like this, heating with a broader section of the iron.

This was the biggest hurdle I had to jump (so far) in learning to solder.

I learnt to slow down, take it step by step and refer back to the experts on YouTube whenever a problem arose.

My final neopixel jewell, wired up to a GEMMA M0, looks like this.

The final product of course doesn't show the trials and tribulations I went through.

At the end my feelings were part punching the air triumphant and part relieved that I had jumped what was for me a high hurdle.

Ultimately, to learn a new technique, to learn something new, you need to be motivated by a goal you want to achieve. For me that goal is to become a 21st C maker. That goal is a motivator to persevere and keep learning when difficult problems arise.

I'm wondering how I can communicate these lessons to my students when I go back to teach.

Monday, July 12, 2021

Turtle Art web browser version

I've written about the beauty of Turtle Art in the past. I learnt recently, via Gary Stager's blog (here), that a web browser version has now been released. It's a beta.

As a refresher, I made square which rotates around a vertex and changes colour:

They have a new feature where you can save as a SVG, creating a workflow for digital fabrication tools. I found this to be buggy still. When I tried to save Hairline it slowed down my browser and then froze the page. Later, I found this comment in the Help:
"The TurtleArt Converter is an experimental feature. We update the version regularly" (p.13)
To upload a previously completed project you drag and drop the PNG file onto the workspace. I had to read the Help to figure that out.

Samples provides a useful learning sequence, which starts like this. The developers (Brian Silverman and Paula Bonta) know how to teach.
Exemplar # 1 uses forward, right, repeat and clean to draw a 10 pointed star
Exemplar # 2 shows how a slight variation in the first exemplar produces a different pattern
Exemplar # 3 shows us how to modularise the code by naming stacks. This made me think I should redo my example above so that the main procedure calls a square procedure:
Help is useful, very clear, well written with timely graphics. Here are some things I learnt from Help:
  • p.3 click and hold a block to see what it does
  • p.5 describes a cool way of adding an input (box1, box2 or box3). Drop it on a named hat. Then alter the relevant numbers to the desired input (eg. box1). Then use the hat control block (automatically generated when you name a hat) to specify the inputs you want. I used this method to make circles which vary in radius
As already mentioned the Web Turtle Art Converter is still buggy in my Firefox browser.

However, I didn't know anything about drawing machines so I looked up axidraw which was mentioned in the Help (p.11). This provides another new way to bring maths to life! The AxiDraw v3, USD$475 is their most popular model. More details here.

Gary also provided a link to an Exploratorium article which describes the workflow from Turtle Art to the Vinyl cutter. More maths for the 21st C here!

The search for all the articles I have written about Turtle Art: here

Thursday, July 08, 2021

My publications about the 3 game changers of 21st Century learning

These are my more substantial, big picture, publications, gathered in one place:

innovation meets resistance: the war between ancients and moderns

Own your own factory, that makes more factories (March 2022)

Organising a 3D printer building activity(January 2022)

the 3 game changers: high level overview of the possibilities (September 2021)

21st Century Curriculum (September 2021)

Thoughts on reading Paulo Blikstein, the founder of the Fab Learn Schools Movement (August 2021)

The Wider Walls in a book commemorating the 50th anniversary of the seminal paper by Cynthia Solomon and Seymour Papert, “Twenty Things to Do with a Computer.

Your town need a community Fab Lab (July 2021)

Maker Space and Middle School Curriculum Reform (June 2021)

Culturally Situated Design Tools: Dotted Circles Exemplar (December 2019)

The three game changers and disadvantaged youth (Nov 2019): presented to and discussed with Leon Tripp, Regional Youth Programs Coordinator, Southern Region, Department of the Chief Minister and Cabinet

Digital Innovation in Secondary Schools (July 2019) Submission to The Education and Health Standing Committee (a committee of the Western Australian Legislative Assembly) inquiry into Digital Innovation in Secondary Education

The teaching of coding (Jan 2019)

Tuesday, July 06, 2021

musical glove with the CPX

SUMMARY:
  • The notes play a regular pattern at whatever pitch: 1 beat, half beat, quarter beat, rest quarter beat, quarter beat, rest quarter beat, 1 beat, rest half beat.
  • Twist hand to the right increases the pitch
  • Twist hand to the left decreases the pitch
  • Tempo starts at 120 bpm
  • Tilt hand up from wrist increases tempo by 20 bpm
  • Tilt hand down from wrist decreases tempo by 20 bpm
  • Loudness starts at 128
  • Shaking increases loudness by 30
  • Turning hand face up decreases loudness by 30

This is a great tutorial by Kathy Ceceri. In turn Kathy's inspiration was Imogen Heap who pioneered the MiMu Gloves.

Here is an Imogen Heap TEDX talk about and demonstration of the gloves: Sculpting Music with Mi.Mu Gloves

Given that the MiMu gloves cost 1,299 pounds for one and 2599 pounds for a pair this one is a poor persons version. The end product sound is not quite as good ;-) but the concept is brilliantly illustrated.

The making part is straightforward. I bought a cheap pair of leather riggers gloves at Bunnings and attached the CPX with some velcro. I want to clip the battery pack onto my belt so the only other piece of equipment was a JST battery extension cable.

The coding is the more interesting / challenging part of this project. You start with a single note (for instance, middle C) and can vary up to four things: the pitch, duration of the note, tempo (the default is 120 bpm) and volume (ranges from 0 to 255). My simpler version, so far, just varies 3 of those things, the pitch, tempo and volume. Follow the link to Kathy's instructions for varying the note duration as well.

Setup code, you need to make a "loudness" variable:

Tilt the fingers / hand up or down to change the tempo:

Map the sideways tilt (angular pitch) to the frequency (musical pitch) of the notes. I mapped a maximum tilt to the left (+90 degrees) to Low C (represented by the number 131) and a maximum titl to the right (-90 degrees) to High B (represented by the number 988):
(Click on this image for a closer view of how the map function works)

Use some remaining hand motions (shake and face down) to change the volume. For this I created the variable "loudness":
Finishing touches, I've just focused on the core functionality for now. I could:
  • make the neopixels light up in different ways depending on the hand motion (update 11/9/21 I've set the photon hue trail to the tempo value and paused the photon by 500 msec as it travels. I'm getting a nice range of photon trail colours as the tempo changes.
  • add a small speaker to make the sounds louder (I have ordered some from adafruit)(update 11/9/21 I've hacked some speakers through the A0 speaker pin to the speaker jack, this improves the sound since the CPX speaker is too soft
  • incorporate the note duration features as suggested by Kathy, the author of the adafruit tutorial (update 11/9/21 I've copied Kath's suggestions here so now have 4 variables: the pitch, duration of the note, tempo (the default is 120 bpm) and volume (ranges from 0 to 255)
SUMMARY:
The notes play a regular at whatever pitch: 1 beat, half beat, quarter beat, rest quarter beat, quarter beat, rest quarter beat, 1 beat, rest half beat.
Twist hand to the right increases the pitch
Twist hand to the left decreases the pitch
Tempo starts at 120 bpm
Tilt hand up from wrist increases tempo by 20 bpm
Tilt hand down from wrist decreases tempo by 20 bpm
Loudness starts at 128
Shaking increases loudness by 30
Turning hand face up decreases loudness by 30

Thursday, June 24, 2021

maker space and middle school curriculum reform

(1) THE VISION

Personal Fabrication is on the cusp of exponential growth (the 3rd digital revolution). Due to plummeting costs of the technologies, the opportunity now exists for citizens and schools to do what big corporations previously did. The potential to make more things has expanded dramatically and will continue to do so. We are moving towards a situation where people will be able to design and make almost anything.

From a school / student point of view, this can mean more choice: a negotiated curriculum and more project based learning where students make smart machines, digital wearables or Internet of Things apps. Most students become more engaged when making things. The success of the “hands on” approach is confirmed by experience.

This also gels with a sustainability / recycling theme where “junk”, previously thrown out, becomes the building blocks for new products. Some cities, eg. Barcelona, now pursue this as a major goal.

This is part of the meaning of 21st education as is being developed by the Future Schools Alliance

(2) THE CURRICULUM POSSIBILITIES

The 3 game changers are coding, physical computing and the fab lab or maker space. I’ll classify some possible curriculum offerings, which are innovative, under the sub headings of Coding only and Making plus Coding. These could be standalone subjects or become part of a curriculum integration endeavour.

CODING ONLY
Scratch Coding
Turtle Art
CSDT (Culturally Situated Design Tools)
Computer Game Making

MAKING PLUS CODING (PHYSICAL COMPUTING / MAKER ED)
Artbotics
Digital wearables
Unruly Splats
Personal Fabrication
Toy making
Android phone App Development
Electronic Design (Students will learn how to make new electronics and smart devices from scratch and can hack and improve existing things)
Robotics
Solar car
Smart Machines
Visual Communication and Design
IOT (Internet of Things)

(3) STUDENT OUTCOMES
Experience so far reveals these possible outcomes and this list could be further refined as we learn more:
  • Plan and design a project (the 3*I’s: imitate, iterate, innovate)
  • Finding and using online resources (designs, tutorials etc.)
  • Selecting the right tools, using them efficiently and responsibly
  • Learning new skills, often “hands on”: eg. soldering, sewing with metal thread, hot glue gun
  • Being a good team member, pulling your weight and dividing up the work efficiently
  • Initiative: Getting on with the task without being asked
  • Attempting to solve problems when they arise (independent learning)
  • Resilience: Persevering when things get tough
  • Helping others when they need it
  • Coding (MakeCode, JavaScript, Circuit Python)
  • Knowledge of the new generation of microcontrollers (Micro:bit, Circuit Playground Express)

(4) THE EQUIPMENT

The new microcontrollers (micro:bit and Circuit Playground Express) are both more versatile and easier than Arduino. They open up physical computing to nearly all students

The machines, which are now within the price range of Schools, mean that we can work more accurately and flexibly with a wide range of making materials (wood, plastic, metal etc). The machines make the physical process of making easier but there is a requirement to develop new software design skills.

  • 3D Printing
  • Laser Cutting
  • CNC Milling
  • Vinyl Cutter
  • Digital Embroidery

I have now read a fair bit about what these machines can do and their strong and weak points (eg. the weak point of the 3D printer is that it is slow). However, I have zero practical experience in using them. What is required here is:

  • a series of conversations with experts who have used these machines in a school setting.
  • consideration of what courses we want to run (refer to the list above) and how these machines will enhance that
  • what new software skills will need to be developed

There is other essential equipment required for a maker space.

(5) CONCLUDING THOUGHTS

A Maker Space intuitively seems like a “good idea”, the very notion is appealing. Nevertheless, in the process of developing a maker space there is a dialectic between the new technologies and the curriculum reform process. This has always been true. The computer, a machine, brought in new ways of doing and thinking about things. So did previous inventions such as the wheel or the printing press.

The new technologies do demand curriculum reform. However, the curriculum reform should be driven by a broader vision than technocratic skill building. That broader vision, I would argue, is that we are moving to a society where personal design and fabrication is coming within the reach of all.

SELECTED REFERENCES (there are many more):
Designing Reality: How to Survive and Thrive in the Third Digital Revolution (2017) by the Gershenfelds, Neil, Alan and Joel-Cutcher

The Art of Digital Fabrication: STEAM Projects for the Makerspace and Art Studio (2019) by Erin Riley

Invent to Learn: Making, Tinkering and Engineering in the Classroom (2019) by Sylvia Martinez and Gary Stager

Saturday, May 29, 2021

CPX light box

The full tutorial is here. Rob has some nice extension ideas there too, which I haven't tried yet.

This is a relatively pure integration of digital technology with art. The Circuit Playground Express (CPX) provides backlighting for drawings done on tracing paper.

Materials: Shoe box, light card, CPX, tracing paper

I'm a poor artist so I googled "easy to draw pics" and picked some from this site. I used a 6B pencil.
Here are a couple of videos which show how it works:

Sunday, May 16, 2021

CPX fabric friend

When I made Leah Buechley's Lilypad interactive stuffed monster I said then that I would also make another version using the Circuit Playground Express (CPX).

This time I'm using the pins more than the sensors so I'll show that diagram:

Rob Morrill has included this project in his course and called it Fabric Friend, so I took those instructions as my guide.

This is the first time I've used adafruit's Flora RGB smart neopixels and a LiPoly battery so there was significant new learning in this project for me.

First step was planning the design. I wasn't original here and used a similar design to my previous stuffed monster. It's important to plan it on paper so that all the connections are in the correct place:

Then you can transpose the paper plan onto the felt fabric. This shows where the CPX (larger circle) and two Flora neopixels eyes (smaller circles) will go:

Rob has some excellent diagrams in his tutorial showing how to connect up the CPX to the Flora neopixels.

The tutorial recommends to write the code and test the circuit using alligator clips before sewing, so I did that:

Here is the test code:

Sew the CPX to the fabric using normal thread:

I then stuck the neopixel "eyes" to the felt. You have to use the correct glue otherwise they will fall off at the wrong time! A glue that works well is Reno Art Tacky Glue.

Now I'm ready to sew the connections with conductive thread:

Follow the conductive thread sewing tips in the tutorial:
  • the looping technique to make a knot at the start and finish
  • sew three times around the eyelets on the CPX and neopixels
  • apply clear nail polish on the knots at the end to stop them unravelling

The next pictures show the fabric friend after sewing with metal thread, front and back views:

Next I have to sew the front and back together, stuff it with filling and find a good place for the battery:

THE CODE

I've copied Rob's Magic Eight Ball code ideas here, with only minor alterations. Ask the Fabric Friend a questions with a Yes / No answer, then shake it. It uses a random function to come up with one of three possible responses: Yes, No or Confused. I've taken it to class and played the game with students and they like it a lot.

Here is the almost finished FF waiting to be shaken. I've tucked the tiny LiPoly battery inside:
LIPOLY BATTERIES

The LiPoly battery I've bought from Core Electronics (3.7v, 120mAh) from is small enough to tuck into the Fabric Friend itself. Their advantage is superior energy density. I read up on the safety precautions about these batteries. The main danger is in charging, do not use a charger greater than the battery voltage (3.7v). If you do they can explode. Read the safety precautions and the full pdf at the adafruit site, li-ion-and-lipoly-batteries, about these batteries,

Sunday, May 02, 2021

CPX light bot

Here I utilise the light sensor on the Circuit Playground Express to help control a model car.
Go here, Light Bot Project, to see another great tutorial from Rob Morrill My model car looks like this:
Material and building the car issues:

Rob provides an amazon address for a continuous servos and wheels kit. I did buy that one but have since found similar materials available through adafruit (continous rotation servos, matching wheels). I'm mentioning this since, as far as I know, adafruit treats its workers far better than amazon does.

The tutorial says "Create a reinforced bottom for the front of the robot" but doesn't stress that this could be done to increase the surface area for attaching the servos by cutting notches that match the ones on the chassis. Doing that would strengthen the wheel attachments.

I bought heavy duty velcro from Bunnings (holds 3 kg) for attaching the CPX and battery to the car.

Coding issues

Rob claims that the CPX Slide Switch acts like a forever loop when moved left (always checking). I didn't find this to be true so I abandoned use of the Slide Switch and used a forever block instead.

The car in the tutorial has an awning. The plan is that when it approaches a wall the shade produces less light and this is used to trigger a reverse and turn. I found this too fiddly because light varies within a room and different times of the day. So, instead I reversed the approach and coded so the car goes forward in "normal" light and then shine a torch on the sensor when it approaches an obstacle to put it into reverse.

Here is my modified code, with some comments attached:
And here is a short video of the light bot in action:

Monday, April 26, 2021

Scratch course new upgrade

This is the third upgrade of a Scratch introductory course and a substantial one at that.

In my previous upgrade I developed some good projects but I gave too much of the code to the students. The problem with that of course is that copying for quite a few students doesn't produce learning. So, this time around I'm providing lots of clues and expecting them to work out how to put the blocks together. Of course, I'll do demonstrations for those who want more clues. I'm hoping this will encourage more trial and error and will end up with more diversity in their project solutions.

I'm keeping the core idea that Scratch multimedia coding is for telling stories in an interesting and entertaining way.

I'm insisting on more collaboration than in the past. For a couple of these projects a requirement is that students choose a partner.

I only teach these Year 7 students for 2 x 55 min periods for 9 weeks so it's not possible to cover all of the many great features of Scratch in that time. For those who work more quickly I do have extension projects planned, either letter magic, my music or make a game

Below I just show the tasks set for the students, not the preparatory clues. Send me a message if you want the full worksheets, I'm happy to share

So, the stories are:

1) Weird animals

Make your animals look and behave weirdly. Do at least two different weird animals.

eg. a cat that thinks it is a dog and barks. It also has it body parts rearranged.

But don’t copy that, use your own imagination and creativity!

2) Animate and Communicate

Choose a partner for this one

Think of a simple story. You will need to choose two sprites. The first sprite moves in some way and talks. The second sprite waits until the first sprite has finished and then responds by moving and talking.

a) Write an outline of your story using words and pics on paper and show the teacher. You will receive more credit if your story is interesting and entertaining!

b) Now develop the story as a Scratch program

3) Glide and Draw with the Pen

a) Get the graph paper with a Cartesian grid from the teacher and draw your initials on the paper

b) Use that as a guide to draw your initials on the Scratch page

4) Teleport

A character teleports from one place to another. On arrival in the new place something surprising happens. Work with your partner to develop this story Make it entertaining.

5) Sensing

Make a sprite do something strange by moving the mouse

At certain mouse positions the sprite talks to the user about what is happening. This varies in different positions.

Include a two colour gradient background

Previous:
scratch course upgrade
introductory scratch projects with a story theme

Friday, April 23, 2021

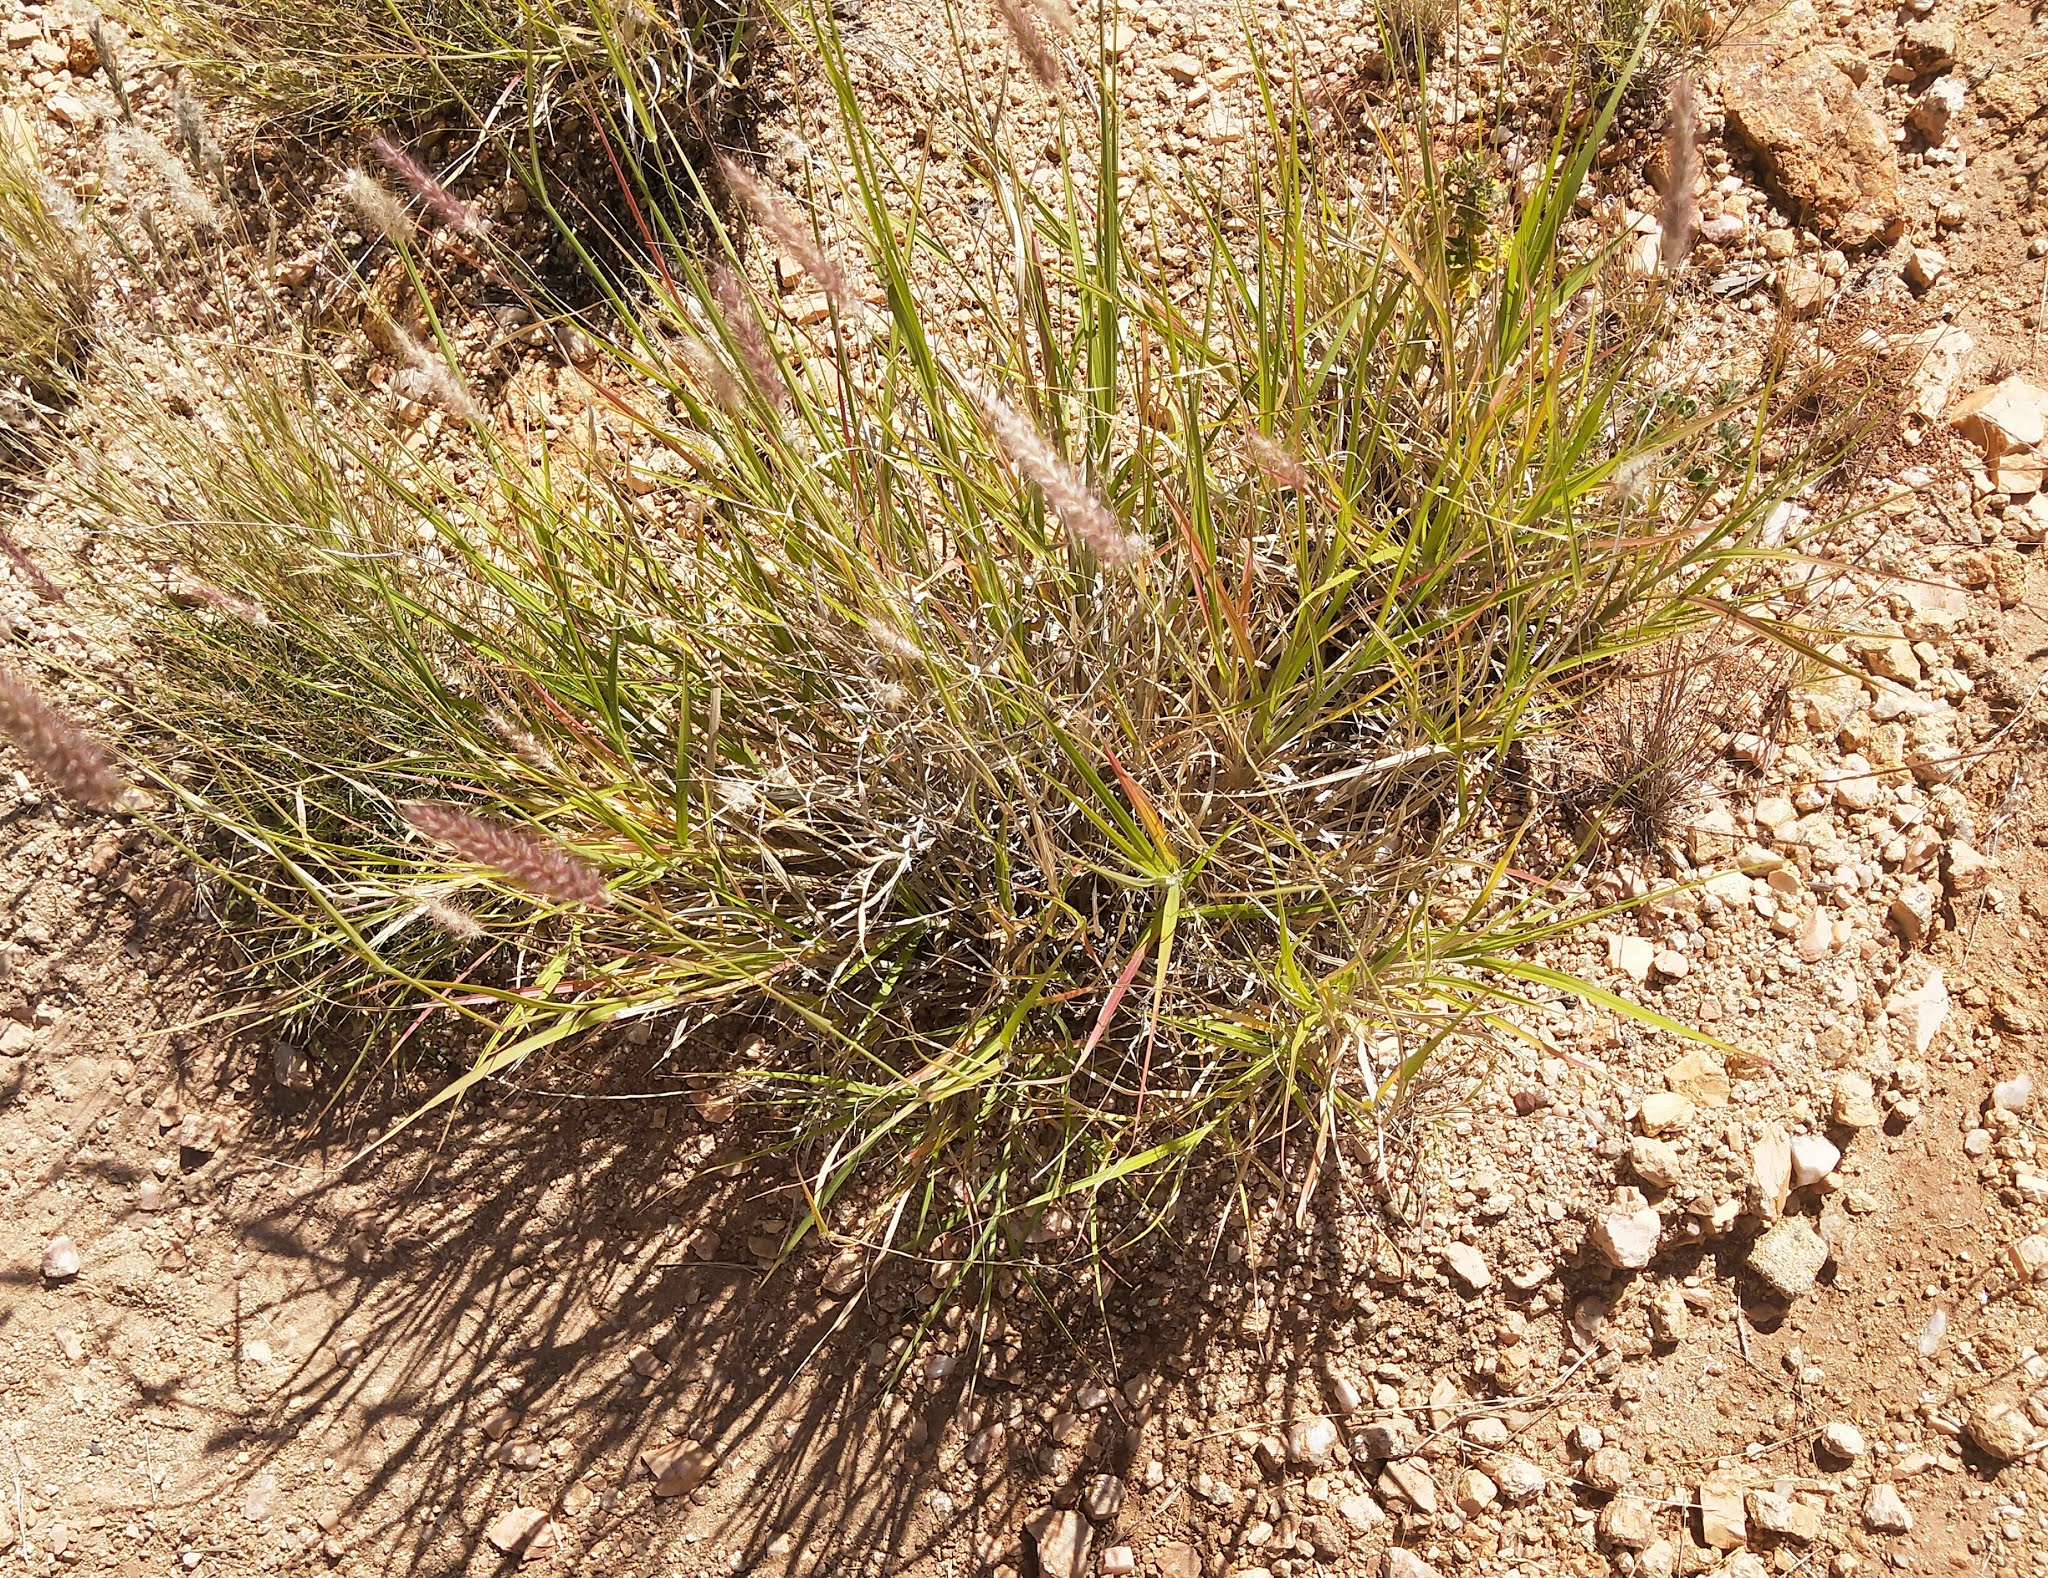
some plants of Alice Springs (Mparntwe)

Pictures taken along the Larapinta trail, near the telegraph station

Buffel grass (invasive species, which is everywhere)

Woolly oat grass

Dead finish with its unforgiving rigid and thorny leaves providing protection against water loss and predators

Origin of the name: Either, when this one dies then everything else is finished, or, in a drought the desperate rabbits try to eat its leaves and die in the branchces!

Silver witchetty, the witchetty grubs (yum) feed on the sap inside the roots

Close up of a witchetty showing flowers, seed pod and leaves

Dog wood, identified through the "Central Australian Flora" brochure

Mulga, can survive in the harshest conditions (in 2019 Alice Springs had its lowest rainfall on record, 67.6 mm). The hardwood is useful for fencing and as a fuel for campfires.

Not identified

Sunday, April 18, 2021

the wider walls

In commmemoration of the 50th anniversary of "Twenty Things to do with a Computer" by Seymour Papert and Cynthia Solomon

THE WIDER WALLS

“the room was humming harder
as the ceiling flew away”
- Whiter Shade of Pale by Procol Harem (1967)

Seymour was very good at finding a great pithy expression to describe a learning event. For example, he described the turtle as “an object to think with”. Another such expression is “wide walls”, to express a diversity of doing, but I’m less certain about who coined that one.

I wasn’t aware that the concept of wide walls (as distinct from the expression) was there from the start. I thought there was a transition as the baton passed from Seymour to Mitch Resnick. Not only did the turtle become a cat but, in my mind, the philosophy also changed from “low floor, high ceiling” (Seymour) to “low floor, wide walls” (Mitch).

Being a long way away, in Australia, perhaps I missed some nuance. Maybe someone closer to MIT can fill me in. In reading “Twenty Things ...” I can see the wide walls were there from the beginning: floor turtle, screen turtle, turtle graphics, game making, movies, music, robots, light displays, poetry, physics, curiosity about self, even making fun of Computer Aided Instruction.

Nevertheless, we owe a lot to the Scratch team for continuing to lower the floor (block coding), opening the windows (remix and a web site where it is so easy to share) as well as wider walls (easy to code multimedia and extensions to music, the micro:bit, Makey Makey and others). The user interface, with its colour coding of blocks into categories has always been brilliant.

What attracted me to computers in the first place was Seymour’s book “Mindstorms” with its intention of making maths more accessible to those who struggle with textbook maths or maths in general. Start by drawing a square using your body. Build further from that simple starting point by changing the angles, changing the number of repeats and introduce variables. This approach was both more interesting and could bring maths to more students.

Tinkering: Seymour was also there early on in a collaborative article with Sherry Turkle, “Epistemological Pluralism”. Ostensibly, this was directed at the needs of girls but in reality, it was about those who tinker or the bricoleurs. It’s better to initially allow sloppy code (spaghetti) and for design to iterate through stages. If a teacher insists on getting it perfect from the start then that is a sure way to kill motivation in many students. If only the standards based curriculum designers, remote from the classroom, who separate the what from the how, understood that. This was pointed out by Mitch Resnick in a recent exchange with Mark Guzdial in the comments at Mark’s blog. There are those who understand how the wider walls can work and those who, through not understanding, put up barriers to them working.

In my research, I came across a thesis by Jennifer Cross where she designed a course called Arts & Bots. Taking this cue, I wrote a submission for a new course in my current school and called it Artbotics. Rather than robotics, we can have Artbotics, with the Hummingbird Bit. Let us create a provocative, tangible sculpture and then add robotic actuation and sensing. This reframing of robotics makes a difference. The artbotics word hit a nerve since there is an ongoing desire for school administrations to introduce more creative middle schooling curricula. I see Artbotics as another expression of wider walls, integrating different subjects in the curriculum into a whole which students find more meaningful.

As Seymour pointed out, the computer has a protean nature and can be used as a multimedia hard fun machine. It is also true that the division of Knowledge into different subject domains, although useful in some ways, has always created artificial distinctions too. Maths can be Arty. Art can be Mathy.

Look up Wassily Kandinsky for more like this

In Central Australia, where I live, there is a famous indigenous art movement called Papunya Tula. One of its core motifs is dotted circles. I had a go at simulating parts of that work using SNAP and the local gallery in Alice Springs agreed it was worthwhile. I invite you to see the simulations at my blog, with a link to the SNAP program where you can do your own.

By making art a real part of the plan we soften the traditionally hard cultures of the STEM subjects and broaden the appeal of the whole mix. It has to be real and it can be real because digital by its nature does embrace everything. A program such as Scratch is multimedia with built in icons, backgrounds, sounds, music, speech with all of them editable. The coding is there too, of course, and the purpose of the coding is to bring the multimedia to life.

As well as art, storytelling needs to be in there too. I managed to rewrite all my introductory Scratch projects as short stories rather than lessons in technique, eg weird animals where the dog meows and the cat barks. This serves as a good model for later when I ask students to create their own stories.

One of the best expressions of the wider walls concept is a 2005 article by Mitch Resnick and Brian Silverman about how to evaluate construction kits. We need those design principles now with all the new construction kits (and this also applies to the new microcontrollers and new software) that have come on stream.

A key principle here is that a little bit (of programming) goes a long way. By using the KISS principle, new users will make a fast start and the possibility is there to transition rapidly to projects they really want to do, not just can do.

When it comes to learning principles the value of tinkering and iteration (iterate, iterate, iterate …) as well as curriculum integration also fit under the rubric of wider walls.

You can see the same KISS principle designed into Turtle Art (by Brian Silverman, Paula Bonta and Artemis Papert). Its variety of coding blocks is restricted yet you can make beautiful art readily. See some beautiful Turtle Art here

Here's a sample from my article How to create a great background in Turtle Art:

What I’ve really been looking for is a pithy expression to describe the ongoing evolution of the creative use of computers in education. In reading “Invent to Learn” (thanks to Gary and Sylvia) I was struck by the three game changers assertion, the game changers being coding, physical computing and fab labs. Could there be a pithy expression to describe these?

Possibly “wide walls”, although a good try, lacks a bit of oomph, requires too much explanation and can only be stretched so far. Can we set the world on fire with wider walls? Perhaps. As my students explore more I do feel the room humming harder ... but I am still not satisfied that it is an adequate descriptor.

Jay Silver takes this a step further when he situates his invention, Makey Makey, within a larger context. He designs tools which enable a sensual re-experiencing, a re-seeing, of the everyday world. With Makey Makey you can make an orchestra which is played by pieces of fruit, rather than a keyboard. Digital meets the banana. It began with Seymour’s insight that the turtle could be “an object to think with” and has now further developed, in Jay Silver’s words, into conceiving the whole “world as a construction kit”.

The world as construction kit has a very long history. Indigenous Australians used to live off the land and made all their tools, as well as their food and medicine, directly from nature. When they looked at the natural environment they saw a construction kit.

The part of this argument that I like is that our perception is a variable: we can design new tools, like Makey Makey, which changes the way we perceive the computer / keyboard. Insofar as modern consumerism can kill off self reliant productivity this new way of perceiving is a good thing.

Wouldn’t it be desirable for many more of us to become more maker orientated, particularly if the developments in modern technology lower the entry barriers? From STEM to STEAM then moves on to STEAM for the 99%.

STEAM for the 99% means bringing all of the subjects to a broader audience. This may be achieved through diverse cross curricular subjects which go under names like Artbotics, Digital Wearables, Culturally Situated Design Tools and Unruly Splats.

When the computer is used as a dynamic (programmable) multimedia fun machine it becomes the best tool available for wholesale curriculum integration. In other words it’s time to merge the computer into the world with all its junk. If that isn’t wider walls, then what is it?

REFERENCE
Cross, Jennifer. Creative Robotic Systems for Talent-Based Learning (2017)
Culturally Situated Design Tools
Makey Makey
Papert, Seymour. Mindstorms: Children, Computers and Powerful Ideas (1980)
Papert, Seymour and Solomon, Cynthia. Twenty Things to do with a Computer (1971)
Resnick, Mitchel and Silverman, Brian. Some Reflections on Designing Construction Kits for Kids (2005)
Scratch
Silver, Jay LENS x BLOCK: World as Construction Kit (2014)
SNAP
Stager, Gary and Martinez, Sylvia. Invent to Learn (2nd Edition, 2019)
The goal of a first CS course should be to promote confidence …
(see comments 2, 3, 11, 13, 14, 15 and 16 for discussion between Mitch Resnick and Mark Guzdial)
Turkle, Sherry and Papert, Seymour. Epistemological Pluralism and the Revaluation of the Concrete (1991)
Unruly Splats

Thursday, April 15, 2021

CPX gondola

Rob Morrill has written a course of Circuit Playground Express projects for adafruit. One of them is the gondola which I feature here.
I didn't have to make any modifications to this one but here are a couple of notes about the materials.

I used velcro to stick the CPX to the cardboard. Better if you can find a "Heavy Duty" velcro, holds 3 kg, which I found at Bunnings.

The shelf, supported by gusset braces, for the battery is important so the gondola hangs perpendicular. Wrap a piece of masking tape all the way around the battery for extra support.

See the video for my gondola in action!

Monday, April 12, 2021

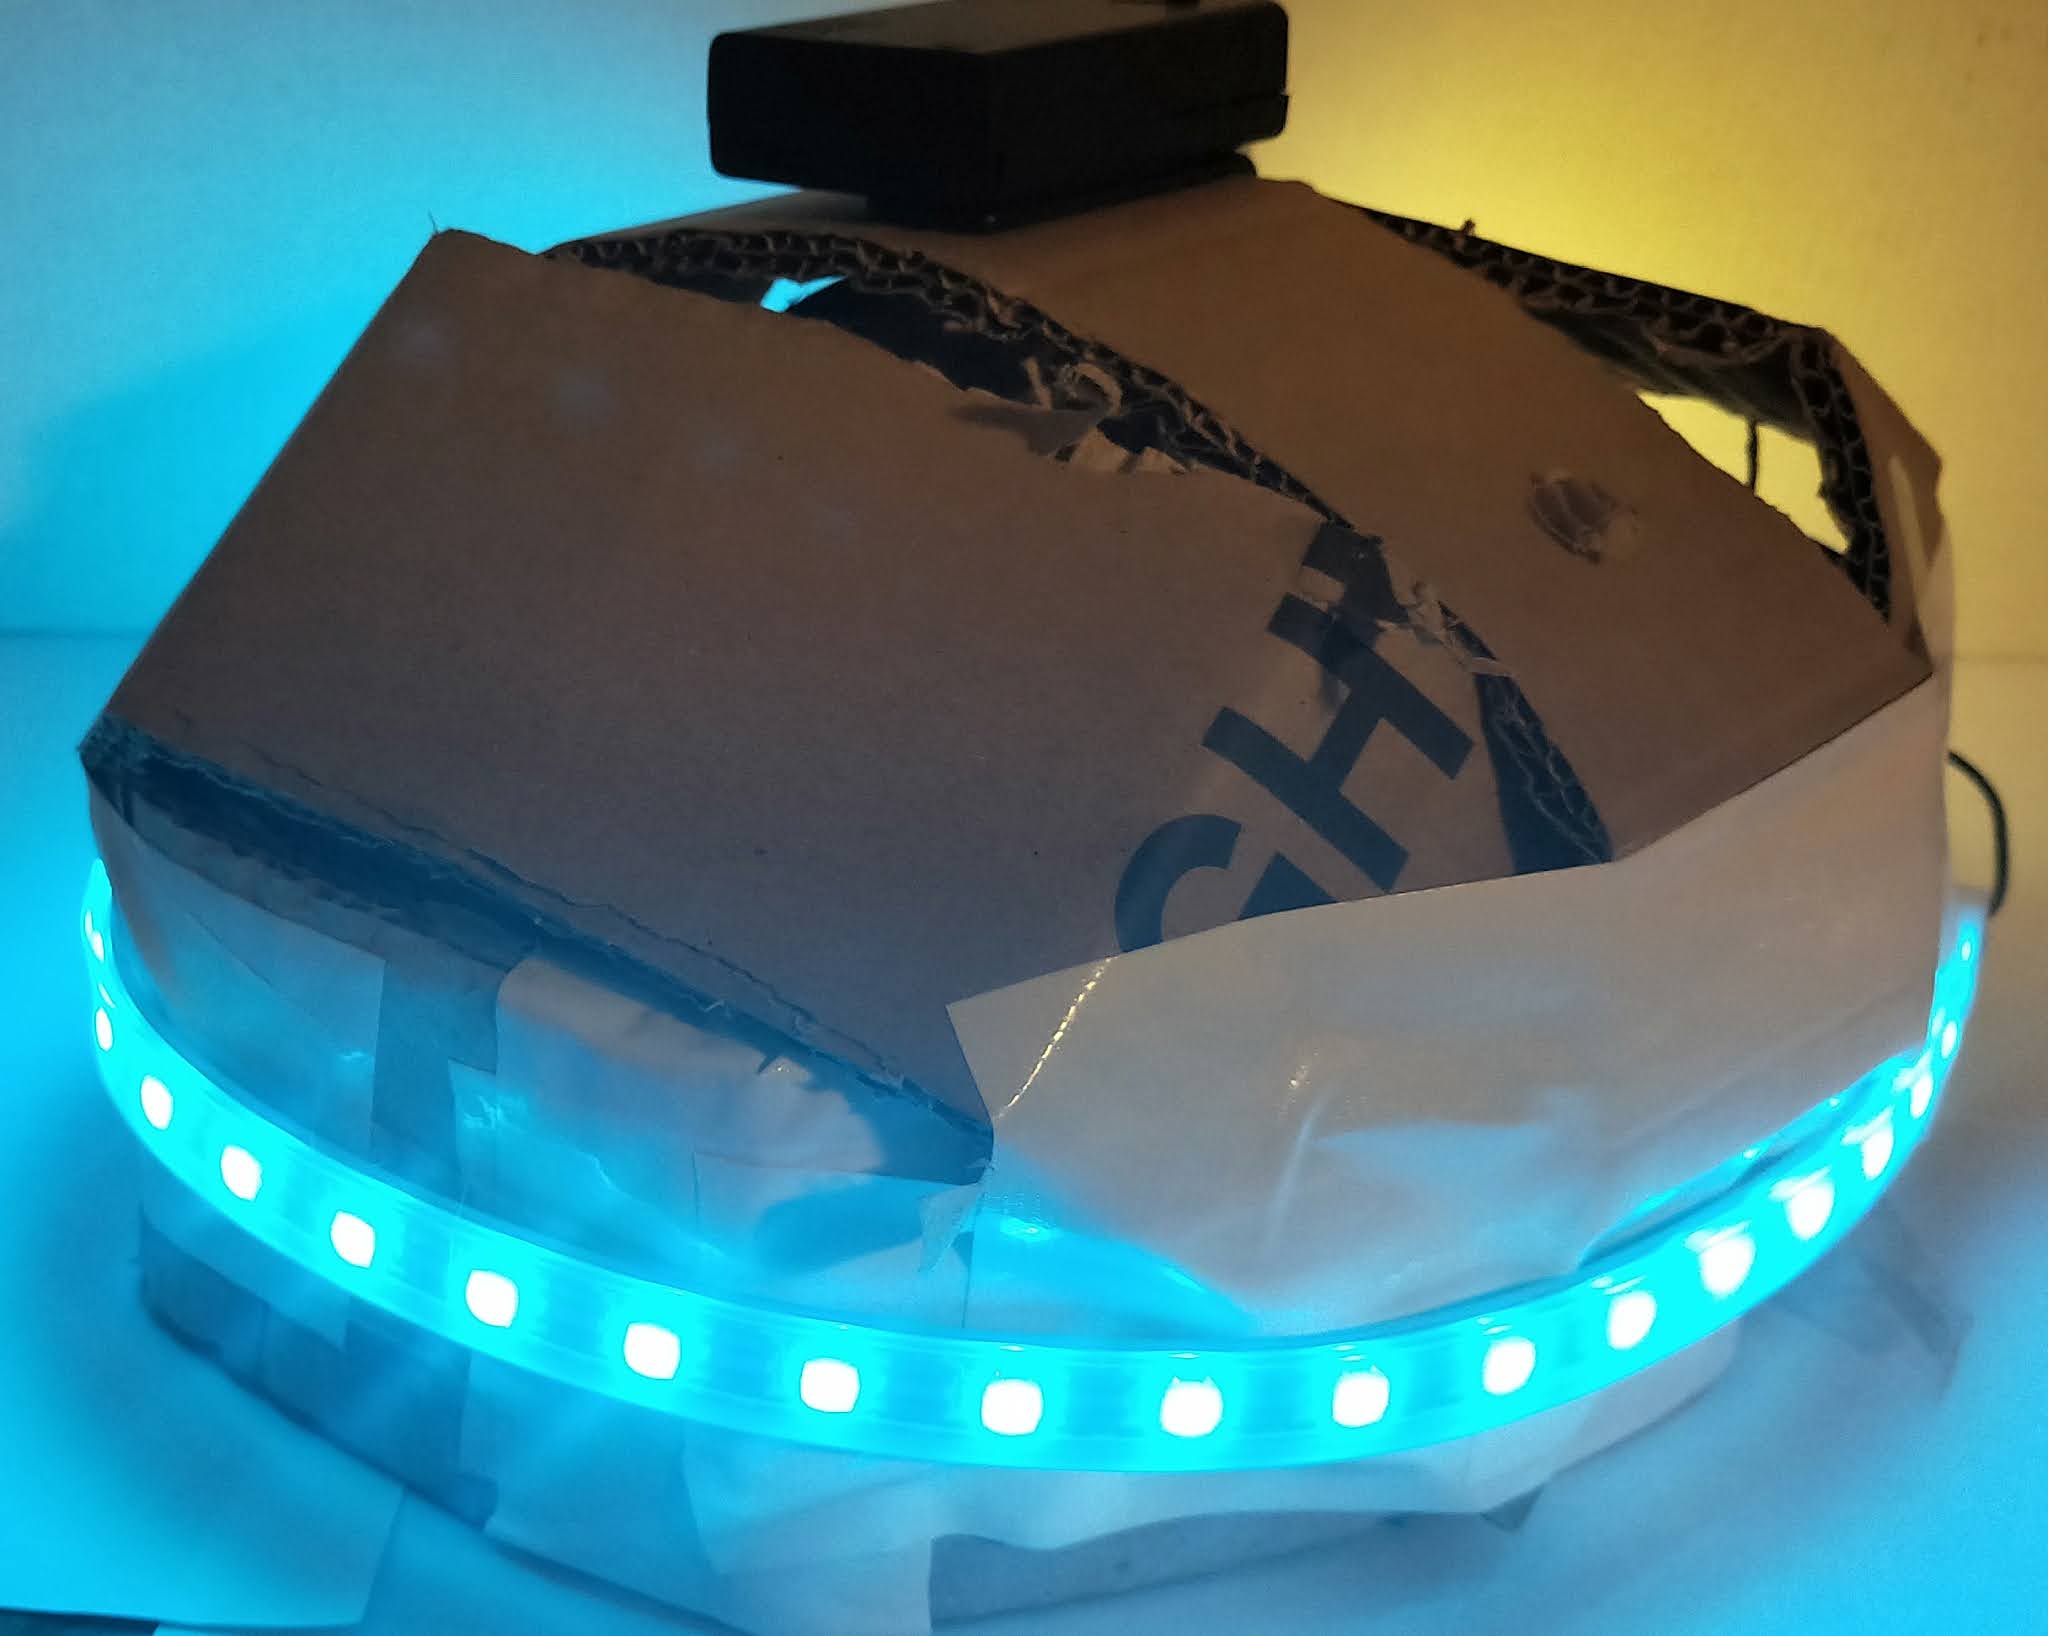
CPX bike helmet prototype


I followed the procedure (helmet) authored by Rob Morrill on the adafruit site. Rob’s personal web site is here. He has great ideas there.

Here are a few notes about the materials since it saves a lot of time if you get them right at the start.

I had to find a piece of cardboard as long as the circumference of my head (56 cm).

I like duct tape because it really does stick and also used it to repair the cardboard which was damaged in a couple of places.

The battery holder I used (AAA) had an on/off switch and a belt clip. The belt clip made it easy to attach the battery to the cardboard

I kept the “right” and “left” variable declaration and “on start” code the same as Rob’s but altered the tilt right and tilt left functions since they required tilting the head at an extreme angle before they kicked in. My altered code is:
This means that as soon as the head stops tilting the indicator lights change back to solid pale blue.

I’m looking forward to some of my students making this helmet prototype. The reaction when I have shown them has been extremely positive. I receive lots of requests from students who want to wear the helmet.